Quantcast
Channel: Web Junkies
Viewing all 3220 articles
Browse latest View live

Wizard/Necromancer Guide in Aura Kingdom

$
0
0
Credits: Special thanks to aeee98 for making this guide. If anyone deserves recognition, then that is aeee98.

Today, I am going to bring to you the first Wizard/Necromancer Guide in the entire server. The reason why I did that, is partly due to a comment made by one of the guys in game, who said that Necromancer literally sucks as a sub, and you shouldn't play it as a subclass. Well, in my opinion this is definitely not true. Necromancer does bring about many plus points, making it worth for players to try the combination.

Pros of the Wizard/Necromancer

1. Best Defensive skill in the game plus the Best offensive skill in the game (Bone Shield and Rejuvenating Prayer) can be used together for bossing.

2. Your cycles without Max SPD have more AoE now with Black Fire

3. You get 3 cute summons for extra damage. (They actually do quite a bit of damage and you don't need to heal them)

4. Cheapest Lifesteal Weapon with the best stats.

5. Come on, the sub skills are flashy enough, right? Lot's of Flashy Skills which do Tons of Damage.

Cons of the Wizard/Necromancer

1. You lose your large SPD buff from Gunslingers early on, which means you need better equipment if you want to cap SPD. (Not Vital)

2. You have no Combo Skills (Not Vital except if you want to PvP)

3. Not as strong in PvP (No real Hard CC unlike the Nightmare Totem from a Sorcerer Sub, and Instant Thunder is just suicide)

4. Quite expensive to make (All Wizards are expensive to make considering they will want the Flokja Accessories to cap SPD for them)

5. Necromancer as a sub meant you won't get the bonus stats from your summons. (Once again, not vital because your objective is to have slightly more final damage)

Like all gear, we need to prepare for the next stage whenever we are going on. I will bring to you the equipment you will need to get, along with optional equipment you will want.

Level 45

Assuming you have a level 60 character since you need it for getting the subclass, I would guess you have somewhere around 2000 Dragon Points in your main character. Hop over to your main, and click on your Adventurer's Encyclopedia. Look at the Scythe's tab and purchase one Dior's Romance for 2000 Dragon Points. Dior's Romance has the best level 45 weapon stats in the entire game, and can be your go-to scythe for the rest of the game if you wish. You don't need to optimise for any stats if you are just starting out, but if you have a whole load of dragon points (I personally need to use dragon points just to get out of the cap) I would optimise a high ATK bonus (Above 135%) on it. You may consider saving the scythes with poor stats on the upcoming Star Fusion system, but more importantly, transfer the Scythe to your Wizard by putting the scythe in the Shared Warehouse.

For Wizard Weapons, just use whatever you have in your level 45 crate. A Flame Glyphed Staff is excellent but unnecessary. But right now, you have 2 bonus damage procs, which is excellent for fast quest clearing.

Level 50

Your first bet is to go to the top right hand corner of the Navea map after you finish both Candeo Marsh and Tratio Highlands. Over there, look for the Master Wizard and buy a Mina's Almighty Staff. Pray that your RNG is good although it doesn't matter. On top of that, you may consider making a full Aria set from the armor crates that you have gotten. It is not necessary but it is good if you want the bonus stats. You still will keep the Dior's Romance. However, start saving up for Level 60 stuff.

Level 55

If you are still using a Divine Grace set, swap to an Elemental Set. Weapons stay as per see. Try to get any level 55 accessories (Either the 3% DMG 4% CRIT DMG ones or the 3%EVA 8% CRIT DMG ones, the former is always preferred). As usual. Don't upgrade your Dior's Romance into a level 55 even if you see it has a better stat.

Level 60

Here is your first big investment (Well not that big, but still). First, head to Analisa, and make your Staff of the Stars. Staff of the Stars provide all the necessary stats you need, the 3% CRIT, a bonus damage proc and the 25% Bonus Crit Dmg to bosses. Ideal cores for that weapon are Deadly (15% CRIT DMG) and Destroyer (10% Chance to reduce target's DEF), but cheap cores like Eagle (2% CRIT), Barbed (2% DMG) are still acceptable. 

Make a cheap Revelations Set with any core without the EVA stat. An alternative is to get a Titan's top to boost your survivability and increase your SPD slightly for faster cooldowns on your skills.

I personally hope you still keep your trophy recipes and a base trophy. Craft a Caroline's Intent for bonus lifesteal. Malodnak's Claw can be upgraded or not, it is up to you. I personally like the stats on the Green.

From Level 60 onwards, it is upon you to prepare for all the Level 65 and 70 items already.

Level 65

Start preparing for Nazrudin's Staff of the Siren. While it isn't a Flame element, you don't truly need a Flame element gear until you have a solid 45% SPD and up. The bonus DMG proc makes up for the lack of damage, and you get a massive damage boost to your Ice Storm. 

If you have the money, get a flame Glorious Staff of Star Dust which can only be obtained from the Sky Tower. Also, upgrade your Armor Bottom set to the level 65 Lion's Roar set for lots of bonus CRIT DMG you are lacking OR the Lethal Beast set which gives you yet another bonus damage proc. 

Once again, your Dior's Romance stays put, unless you have money for a Nocturnal core which you can place into a Scythe of the Evil Eagle.

Prepare to get your Flokja's accessory set ASAP. At the very least, have a 3% DMG, 4% CRIT DMG set with you for easier farming.

Level 70

Massive make over. Swap your Malodnak for a Teda's Immortal Flower (purchasable from the Adventurer's Encyclopedia for 51000 Dragon Points) OR an Ancient Fang of the Fire Dragon, which is better if you have maxed out on your SPD. Your Caroline's Intent stays put.

Get your entire Sniper's set. No, not just the Top set but all. Along with the Flokja's set, you don't need to invest any points in SPD at all. By now, you should prepare for your level 70 weapon, that is, prepare materials to get a Deadly or Destroyer core.

From levels 1-47/48, do not put a single point into any stat. You don't need the bonus stats at all. Save up so you don't need to reset points to respec later.

When you are starting out, you will realise that it is impossible to cap SPD. That is because you aren't a gunslinger sub with a solid SPD buff to aid you. However, that doesn't mean you shouldn't optimise for 30% SPD, which is a good starting point. Get your SPD to 30%, CRIT to about 40% and the rest into DMG. Use this stats until you hit 70, where your damage will suddenly skyrocket with all the bonus items.

In the Defensive Tree, make sure you can hit the 50% DEF mark and invest all other points to HP. IMO you should always aim for a high DEF bonus on all parts so you can spend less points on DEF and ultimately have better defense.

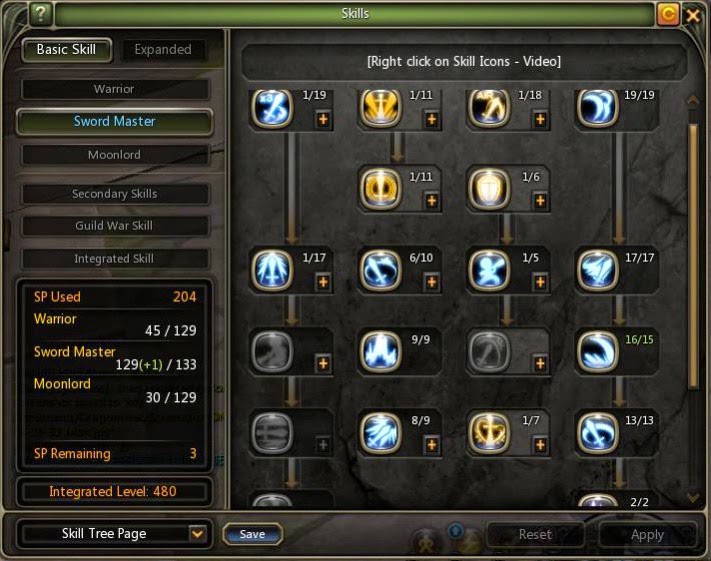
The path of the Wizard is extremely straightforward, regardless of the sub you pick. At level 18, you should be able to get the Cooldown reduction on Meteor Shot the second you get the skill. After that, pace leftwards from the first DMG+1% to get the Shock and Staff Studies. After that, pace downwards from the Fighting Proficiency to get the bonus 6% DMG on staff and the Fire&Lightning proc. Grab the Storm and Ice envoy skill immediately after that. By now, you should be able to roughly guess which points are lacking for the final levels. Grab the DMG and CRIT stats, along with Max HP after you have cleared all of the offensive points.

Masteries are very standard. 

General: Either Ablazed Fire Bomb (Stun Effect) or the Terrorizing Black Flame (bonus damage) should be used. You will never use your Icy Curse, ever so don't think about it.

Attack: Fanaticism (better known as Zeal) Bonus Damage on the target. Don't Take Any Other skill, ever.

Advanced Skills: Lava Fire Meteor for extra Crit on the skill, but if you are the weakest member of the party, it is better to just get the Raid Storm Curse for the bonus DEF reduction.

Defense: Iron Wall, or Courage. Courage is excellent if you have your DEF cap already, otherwise it is safer to use Iron Wall.

Tactical Spec. For soloing, Defense Breakthrough. Otherwise, talk to your party/raid for the skill you should be using for maximum effect.

Special Skills: Sinewy Body (Better known as The Best Defense), for easier DEF cap.

Prior to your max SPD, your character is harder than standard SPD wizards. With a bare cooldown of approx 3.5 spells per meteor, your damage comes alot from your other spells.

If you have a guardian friend (or any friend that has tanky hp and doesn't die from low level meteors), ask him if you can duel him for cast training. This is a good way to step up and master wizard as a whole.

The first thing you need to learn, is what many people call Animation Cancellation. For Wizard, there is no way to Animation Cancel any skill to prepare for the next one. However, you can Animation Cancel Autoattacks within your spell casting. This is a technique called jump-casting.

Let your friend stand at a comfortable spot (the center of the guild hall, or a wide open area). With that, you can prepare to start training your jump-casts.

Note: Even if you aren't a Wizard, you can try this too. Unless you are a boring spin-to-win Ravager. 

Basic Jump-casting

This is best used to start learning how to jump cast. Press Space (jump key once), and before you reach the peak of the jump height, cast a skill such as Fireball. You will realise that sometimes when you cast a fireball, you shoot an autoattack missle as well. If you see that, you have succeeded in the first basic jump cast. Keep doing this until you are comfortable. At the start, you will realise that sometimes you will not be able to cast because you didn't get the timing right. When you are comfortable, do the same with all other spells. 

The tricky thing about this is that the timing for a perfect jump-cast (to cast 2 spells with no delay on the fall of the monster) is not easy. Thankfully, that isn't the most important of the jump-casting training. However, after mastering basic Jump-casting we can't just stop here, right? We have to go to the next segment.

Advanced Jump-casting

Basically this is the same as the Basic Jump-casting, with the exception that you need to move as well! In the later instances such as Sky Tower, Lament of the Thunder Dragon King or any high level dungeon, you are expected to be able to dodge all of those red-carpets because all Bards can't save anyone who gets blasted into bits in 2 nanoseconds. As such, you need to move while jump casting as well.

The advantage of advanced jump-casting is that it improves the mobility of the character and retain the benefits of the basic jumpcast. It also makes it a hundred times easier to kite anything without a gap closer, allowing you to rebuff (with Prayer and Bone Shield, more of the former), stay alive, and give an easier time to the poor bard who is desperate trying to save everyone from Noripan's homing bombs.

While this practice is better done in actual combat, the standard dummy style can still work. Similar to Basic Jump casting, prepare your jump while moving, jump, keep your fingers pressed onto that arrow key, press a skill mid-air. Auto attacks will sometimes come out from these jump casts as well, which shows that you have succeeded.

You need both jump-casts to maximise damage on bosses even when you aren't that geared and to keep yourself alive. This is good practice too prior to max SPD, because if you can jump cast every spell, you can jump cast tons of meteors as well.

IMPORTANT NOTE: The following skills cannot be jump casted: 1) Instant Thunder, 2)Charged Demon Bats. Don't even try, because they don't work.

Necro Battle Tips

1. Bone Shield is a Party Buff as a sub, similar to Rejuvenating Mantra from the Sorcerer (with the exception that the debuff removal part of a sorc sub mantra is single target). Use it before hard bosses if you do not have a necro main in your party, or when you are going solo.

2. Prior to max SPD at 70, Skill Cycles wise, do not use Icy Curse on mobs unless completely necessary. Instant thunder is used for escaping or engaging to mobs. Ghost Summoning is a secondary Meteor which allows more free damage, so make sure you use it every once in a while.

3. Even if you are a Necro Sub, it doesn't mean you should abuse the summons. There are some places you should remove your summons to prevent yourself from trouble. An example is Ozymand Temple (Party), where balls from Helakar which hit the summons do proc the double ball shot. You can remove the summons by clicking on the "Summon Imp" icon and press ok to remove Status.

4. (Note this is somewhat relevant to any Necromancer, be it the main class or not) You can force a monster's aggro to a creep by letting them attack first. There is a Necromancer Skill in which you can command the spirits to attack the target. This is good if the boss keeps on summoning monsters. (Will test this in Cadilla's Secret on the food mobs, and will tell you if it works, but it works for all mobs and sometimes bosses)

Note: Do not attack till they did some damage because the aggro will be cut off from the mobs.

Specific Instance Tips

Note: This assumes you are going to solo the instance (and are geared to do so). This will most likely not take any effect if you are doing in a party, and most party tips are given above.

Infernal Abyss/Whirlpool Abyss Get the entire floor wave to crowd together (preferably as close to the portal to the next floor as possible). Make sure you lock them with Ice Storm before you Meteor/Ghost Summoning. Note that you should command your summons to attack the centermost mob if you are dragging all to the center, and to command to the other side if you decide to lure from one side to another. Zaahir and Nazrudins are quite tricky at the start, but when you get used to it, you shouldn't be getting hit by the carpets unless you get hit by the lag monster.

Landing of the Sky Dragon King: Apart from Meteor spams, you will need an eidolon ult whenever you are stuck at a corner. Clear all Flowertraps ASAP, and keep moving to prevent being hit by the random slow missiles, on the flower queen boss. Flokja is straightforward if you are well geared and won't be harder than mass Sky Tower AoEs.

Level 80 Guardian PVE [Light+Physical] Build in Dragon Nest [T4]

$
0
0
Credits: This Guardian PVE build was created by imbuedHope. If there's someone who deserves recognition on this write up, it should be him.

General Notes

Guardians are not a DPS class. They are not Crusaders, nor will they ever be. They are tanks first and everything else second. While this build attempts to boost damage to a substantial amount, it will not surpass the damage of any other equally geared char.

Always make your build based off your own style of game play. If you increase skills that you rarely use, then you are wasting your time.
Feel free to go out of the norm with your build and experiment with them. Just remember not to do something like get lower than level 4 provoke.
This build is designed for a Physical Light Guardian i.e. with gear that boosts both light and physical damage. If you are a new guardian, please don't follow the gearing strategy; you will want to still to boost your defensive stats to a comfy level until you are used to it.
This build presumes that you know when to stop dealing damage and focus on tanking.

This build has a raid focus; it will still work for other things in the game, except PvP (PvP requires a lot of different skills for various combos); paralyze bolt, Knee Kick, and Dive Kick are skills that you cannot do without in pvp.

As always, use this build as a guideline to form your own builds. Do not copy it point for point unless you're sure that is what you want to do.

This build, is aimed at use after an expected Guardian revamp at around a month or so after 80 cap is released

I am currently planning on using this build. If I decide to make any changes then I will reflect them here and bump this thread w/ what I've changed.

Save your lvl 77 Reset Scroll for until after the buff. You may find that until then maxing out SoF is a waste; tough this would involve a change in gameplay style when the class is buffed if you max out a skill like Goddess Relic (a decent choice to max out since it also does phys dmg now).

As we catch up to kdn in terms of patches, it is probably good practice to maintain a second class such as a destroyer or crusader to swap to since we will be getting information on the raids at short notice and it might be detrimental to force a Guardian into a lineup.

Build


Changes from the 70 Build

Block level reduced
Stance of Faith maxed
New Skills / EX's maxed
Skills that were maxed before are maxed

Notes

Sacred Hammering maxed for Light % boost

Kicks are left since they deal more dmg than hammering for when dmg is needed over mana consumption; and a lack of anything that's needed.

Barrier, Smite, Divine Ascension, and Falling Angel are maxed.

Auras are maxed for support and damage boost.

Aura of Healing Maxed for support and self heal.

Block left at level 3 for utility if SoF gets cleared, etc.

SoF maxed for ease of use with DA and tanking.

Provoke at 5 for some leeway in time to provoke.

Auras are now maxed out and are unaffected by tech rings

To make a base line build from this build change to the following: provoke 4, Stance of Faith 8 (30 sec duration; feel free to drop it to 24 sec if you are OK with it), and Holy Kick 0

For the best results in terms of damage try the following: RB -> Zap -> Stance of Faith -> Block Passive -> HoG -> Armor Break -> Smite -> Falling Angel -> Divine Aescension Spam till HoG runs out (should be able to get ~6/7 out); if running with a crusader then ignore RB, Zap, and ABreak if s/he is casting it actively

Classes with good Sync to boost dmg output: Inqi, Acrobat, Mystic, IW

Light Damage % Stacking Notes
32% Light gems / spark on L grade
4% Shiny frag rings (green)
5% Title (titanic for reference)
30% Conviction Aura
20% Sacred Hammering
Self Buffed Total: 91%
+25% with a priest
+14% with a taoist (+16% w/ tech);
+1% for rare nx rings
"raid" buffed: 130% (not including tech and rare ring)

BDN L Grade vs 80 Epic

Get L grades if you can. The damage boost for this build is substantial. Though 10+ Epics are not bad. Best Combos are probably to get a Chest + Wep or 2xWeps in L grade and the rest as Epic gear.

Complementary Crest Selection

Windswept
Brutal
Intellect / Adorned / Sturdy (based on raid / mana need)
Spirited
Destructive
Fierce
Health
LifeGiving

Talisman Recomendation

Always test out your own combos to see which results in the most stats, it's cheap afterall.

Destructive
Brutal
Windswept
Fierce
Sturdy
Adorned
Health
Life Giving
Intellect

Technique Accessories

Decide these on your own discretion, they are not mandatory and stats may be better to get.

Technique Necklace Divine Barrier (STR / VIT main stats)

Technique Earrings Armor Break (VIT main stat preffered)

Technique Ring Divine Aescension (Phys dmg)

Technique Ring Falling Angel (Phys dmg) 

Complementary Gear and Gem Selection

~~ will be added after DN SEA gets 80 cap and the simulator is updated if I'm not terrible lazy again~~

In general, hit "raid team" crit cap (i.e. crit cap when buffed per your raid team). Then move toward stacking STR. Getting Crit plates to get enough crit will also work and will let you get more dmg via STR gems. And of course, get all the light% you can muster.

Healing, Movement Speed, Elemental Def, and Defense / MDefense Skill Gems are decent. For best results pay attention to how you play and see which is better.

Level 80 Moonlord Skill Build Guide in Dragon Nest [T4]

$
0
0
Warrior Skill Tree

Tumble, Dash, Aerial Evasion : Max.

Mana regen : Max. Why? I maxed it so that I won’t run out mana fast when soloing.

Impact wave lv 6: For fulfilling the 45 SP restriction

Relieve lvl 6:

I level it to level 6 so that I can get 15s status remover. Burn debuff from the level 80 monsters can be really painful when hit.

Dropkick and Sidekick lvl 1:
I learn this for PVP. Just move SP from here and add to imp. wave or circle break (Notice I have 3 SP left after making this build, finally at the end I level CB to lvl 1 for SA breaking purpose).

Sword Master Skill Tree

Moonlight Splitter lvl 19:
Okay, some of you might think “Why level MLS to 19? The dmg growth is not thathigh!” Well, that’s what I’m thinking too. But in 80 cap, we have another 20 SPto maximize our damage output. Even you maxed all of your ML side on SM tree,you’ll still have leftovers SP. I’m using a 20% dmg crest on MLS and I love tosee the output.

Cyclone Slash lvl 17:
If you don’t like CS so much, you can reduce CS to lvl 1, 6, or 11 and add theSP into another skills like Line Drive (which I don’t recommend). Because it’shard to get full hit for CS, it’s not wise to give a crest to this skill.

Crescent Cleave lvl 15(+1):
Use skill ring for this skill please, the damage is pretty good as far as Isee. It deals 17~20 hits on a human sized monster (can be more on big bosseslike ABN, Cerby, Manty, Apoc). I recommend you use 20% dmg crest on this skill.

Half Moon Slash lvl 13:
No need to explain, must max skill for all moonlord. With the ex it becomesfaster, so for PVE 50% Action speed crest is not needed anymore. You can use20% damage plate now, but for hybrid go use the 50% AS plate.

Great Wave lvl 2:
I see something different about this skill after 80 cap patch. The final wave(after you pressed left click) is slowed down, so that now it’s possible to getmany hits on big monsters. However, the final wave is capped at 8 hit. I don’tuse crest for this one because I don’t have more heraldry slots xD.

Triple slash lv 1:
Prerequisite

Front Shove lv 1:
Learnt for Iframe only.

Brave lv 9:
for 15s atk increase, you can adjust this to your own playstyle

Provoking Slam lv 8:
This skill peaked at 50% dmg debuff on enemies. Leveling it to level 9 only increases the damage, not the debuff effects/duration.

Dash slash, Dash combo lv 1:
For PVP only, can be unlearned in pure PVE build.

Aerial Combo lv 1:
Long airborne time for some mechanics and iframe at landing.

Eclipse lv 6:
I leveled this to 6 because I don’t have place to dump SP anymore xD

Parry stance lv 1:
This skill can be a life-safer, but use this skill wisely. Some boss mechanics ignores parry/block (like stomp in guardian nest), so don’t rely on this skill much.

Counter Exile lv 1:
Who doesn’t want an extra aerial evasion?

Moonlord Skill Tree

MBD lvl 12:
Deals monstrous damage, can hit maximum 15 hit (18 max with ex). 20% dmg Crestis highly recommended on this skill.

Flash Stance lvl 6 :
Even though it’s level 50 skill, I don’t use this skilloften. I can never optimized this skill well, so I don’t want to level this tolevel 11.

Thanks for reading my guide! sorry if this guide is bad, this is my first time making a guide lol. If I had make a mistake or you guys have a suggestion just tell me~

P.S: For now I can’t make an equipment and PVE guides, because my gear is trash (waiting for lv 80 volcano set and lv 80 HG jades), so for now I’ll just help with the skill build.

Credits: This moonlord build for level 80 is shared by MarioLuigi of Freedom Dragon Nest guild

The Most Daring Ghost in the Shell Cosplay [Not for Ages 18 Below]

$
0
0
If you think Japan is the only country that can do cosplays that can wow a crowd, then you might be surprise on what you'll see below!

Warning: Explicit Content Ahead!

Below you will see some photos of FHM PH Cover Girl Cherry Ann Kubota portraying Major Motoko Kusanagi from the hit manga series Ghost In The Shell.

In the said photo, the entirety of Cherry's naked "cyborg" body is connected to all kinds of wires and cables. Obviously, this thing is beyond PG.


The photographer of this cosplay is Jay Tablante and mind you, these are just part of his upcoming coffee table book, Geekology. There are more inside that boom which will hit bookstores and newsstands everywhere in the Philippines early 2015.

Level 80 Cap Skill Simulator in Dragon Nest [T4 All Classes + Piercers/Lancers Class]

$
0
0
Dragon Nest SEA players will soon experience the goodness of the level 80 cap but some are experiencing headaches on planning what their level 80 skill builds will be for their class.

So, we've decided to help them by sharing a skill simulator for the level 80 cap in Dragon Nest. You can check out how the skill simulator looks like below.

As you can see on the image above, it's written on Chinese. There's no english version of it yet but we'll sure to update this page when the english version comes out. Well, we think you can easily navigate this skill simulator with the help of those skil and class images. Take note that all things that are included on the level 80 cap are in this skill simulator and those past revamped are also included here so you don't need to worry a bit about its legality.

If you have any questions before using the simulator, feel free to ask us by typing it on the comment box below.

Now go plan your skill build by going to the link provided below.

Level 80 PVE Raven Build Guide in Dragon Nest [T4/3K FD/70L]

$
0
0
This guide is brought to us by DarkRabbit from Freedom Guild of Dragon Nest.

Before: 

After


Shirt, weapon and offhand are +12. Saving money currently to +13 dual weps.

Summary of key stats with 3-set 70L +12 and 4-set 70A crescent armor:
-72k P-atk
-75.11% Dark
-3034 FD (max for 70cap, 41% for 80cap)
-955k HP
-122k CRIT (max for 80cap)
-38k crit dmg (8% for 80cap)

Things you can derive from my raven:

1. 70L has a very small growth in base attack from 60L, as compared to previous caps. From changing to THREE 70L main pieces, all i got was around say 20%? physical attack boost. The boost in HP and critical (forgot to screenie my crit, sorry) is awesome though. Gained around 150k HP and went from 80k crit to maxed crit in 80cap, a challenge for many.

Conclusion: If you have dual 60L+13 weapons, get 70L armour first. It may look nooby, but it's actually more effective in terms of gearing, since you'll need all that extra HP and critical.

2. The HP gain from +10 70A->+12 70L shirt is TREMENDOUS. Around 140k-ish. It is MUCH more than +10 70A->+10 80A, especially when 80A high grade jades are not out yet. It is hence strongly recommended to go full-70L if you have the money. If not, go 3-set 70L like me, and 4-set crescent armor. It is simply not worth the loss in FD and money to go 4-set 80A; with volcano nest/bdn hc's mechanics, you'll get one-shot KO'ed either way if you do not dodge properly.

Conclusion: The only option for 80-cap DPS classes as of now, is 70L. I doubt i have to elaborate for weapons, its either L-grade or go home for DPS characters, like it or not. For armor, 80A is not worth it as of now. You're better off saving money for enhancing L-grade.

3. The jades on my raven are all high grade 70A jades. They're better than 80A jades. Hence, for those of you in 70CAP versions of the game who are preparing for 80-cap, it is recommended that you start collecting the better version of your high grade jades, as you'll be using them for 80-cap as well. By this i mean variations like 1039AGI+261VIT or 861 VIT jades. 

What I'm doing now? Dailies, the occasional volcano nest, BDN HC. I'll be saving money for the next +30% enhancement event, at which I'll try to +13 my weapons again.

Skill Build (Pure PVE):


Missing skills: Lvl 2 The end, Lvl 1 umbra ex

With level 80 cap, a lot of SP are left over, because chaser tree has not been upgraded. Hence, max out every dark skill and fan of edge. I no longer maxed umbra, due to popular requests (lol). It's a nice skill, but yeah I gotta admit it's too useless for most mechanics now. Only use it during solo/farming low level dungeons.

Mp regen is maxed this time. Mainly for solo-ing purposes, as MP is needed now with vigor suffix no longer present in DN.

Sliding step maxed. Mainly for volcano nest. With my ping, it's very hard for me to dodge stuff perfectly. I need that extra bit of iframe most of the time. Hence, maxed for lower CD so i can spam more. If you play other servers and have perfect ping, I recommend you drop this to 1 and get burning call as well as max fake log. Would be a lot better.

So that's that, my build/stats for 80-cap. Will remain that way til I unlock 70L (I really have no other places left to upgrade lol). 16k/35k achievement points WISH ME LUCK FOR FARMING~

Half-Life 2: Episode One Now Available on Google Play

$
0
0
Half-Life 2: Episode One is now available on Google Play but exclusive only for Nvidia Shield Tablets for now.

Half-Life 2: Episode One is the sequel to Half-Life 2 which builds on the single-player campaigns within the original title. As the story goes, players will be "Stepping backing into the hazard suit of Dr. Gordon Freeman and face the immediate repercussions of your actions in City 17 and the Citadel. Rejoin Alyx Vance and her robot, Dog, to once again aid the human resistance in their desperate battle against the totalitarian alien menace of the Combine."

For those of you who want to pick up Half-Life 2: Episode One for your Nvidia Shield tablet, you can do so through Tegra Zone or Google Play for $7.99 which is the same price this game sells for on Steam. This is an Nvidia Shield tablet exclusive game for right now.

Level 80 PVE/PVP/Hybrid Ripper Build Guide in Dragon Nest [T4]

$
0
0
Credits: This Ripper guide is written by Zycranos from Freedom Dragon Nest guild.

Skill Builds:

I’m going to give my opinion on what I think the best PVP, PVE, and hybrid skills builds would be for ripper. Remember these builds are just my opinion and are not meant to be perfect in anyway.

The skill simulator I will be using also does not show the correct number of points allowed in each tree, it should be 129 for assassin, 133 for chaser, 129 and for ripper(which isn’t even possible to use).

NOTE: For all of the build below, the assassin tree will allow 1 more level in mental training, physical mastery, and mental mastery. I recommend maxing physical mastery in all cases and the other two are personal preference.

Let’s start off with a standard PVE build.
Assassin Skill Tree
Chaser Skill Tree
Ripper Skill Tree
I think this is pretty standard if you are planning to PVE a lot. I am not a fan of dedication shadow personally, and if you aren’t either you might put those points into punishment, fan of edge, or maybe the mana passives if you think you need mana, which you might for soloing. The extra 8 points are for getting arsonist to level 8, artful chaser to 11, and learning the level 80 ex. To save space I’m not going to bother showing the ripper tree anymore, since it is obviously going to be maxed in every build.

Now let’s look at a PVP build.
Assassin Skill Tree
Chaser Skill Tree
PVP is a little bit more tricky to build imo. For the assassin tree I put no points into fan of edge (because it is not a very good move in PVP) other than 1 just to get triple edge. I also leveling piercing star to 6 for CTC. Getting mental mastery to 4 is optional, you could get shadow hand instead, I just dislike the move. Maxing mental training was for ladder, so if you don’t plan on laddering you could take those points out and reallocate them elsewhere. In the chaser tree I dropped both dedicate crow and shadow, picked up punishment (for comboing), receive edge for recovery, and got rain drop to 11 for CTC.

Now for a Hybrid build (this is the build I am currently using).
Assassin Skill Tree
Chaser Skill Tree
Okay, before we start on anything else, I want to address why I have only 6 points in fan of edge, because I know people will be asking about it. The board damage on the move is insanely high if you hit all the daggers, and I know that, but in higher level nests the burst frame you get is not very long and fan of edge most likely wouldn’t be used over your other skills (izuna drop, artful chaser, etc.), unless you get it to 21, which wouldn’t make sense in a hybrid build. Also, since this is a hybrid build, I needed points for other skills such as fake cog and aerial evasion.

Alright now lets get down to business. The assassin tree is pretty similar to the PVP one, with the exchange of points from piercing star to fan of edge (if you hate fan of edge you could always switch them). The chaser tree is a little weird. I didn’t get dedication shadow because I find that move too risky and I had a lack of points even if i wanted to get it. Getting all the skills in the raven side I feel is almost mandatory if you are going to PVP, just because of the play style of ripper, you are going to want to combo them as long as possible, and the raven skills make that a lot easier. 14 points in mortal blow is kind-of weird especially if you were planning to tech it to make it 16 (which I do not recommend), but I don’t have this problem because I have a +1 swift blow from a costume weapon which allows me to put that point in mortal blow, maxing it at 15.

All in all, these builds are just my outlook on how a ripper should be built, feel free to disagree. Constructive criticism is always welcome .

Equipment:

For equipment I am currently wearing full BDN, including accessories, which is very pricey. As an alternative new moon/full moon can be worn, but to maximize your DPS (remember you are a DPS class, and not a raven) desert dragon L grade weapons would be the only other thing I can recommend to be worn, which is more expensive than BDN S grades weapons.

As far as jades go, I use agility jades in all of my equips, life jades in all of my armor, and fire jades in my weapons. Welton jades are also very good to get as they lower the targets fire resist. In my accessories I use fire jades in the rings as well, but life jades in the necklace and earrings (if you aren’t alive your DPS is 0).

You could always go FD, but unless you like spending a ton of money, I don’t recommend it.

My stats

My stats unbuffed in town

Crests:

There are a couple different crests plates that work on ripper, but I will start off with the ones that I think are mandatory.

Izuna Drop DMG 20% - I think this is a no brainer. Huge damage, big aoe, relatively low CD.

Artful Chaser Action Speed 50% - I don’t find the 20% DMG option to be very viable due to the insanely long cast time of this skill (even longer with the ex ). If you end up canceling the move early anyways the 20% DMG won’t do anything.

Arsonist Duration +20% or CD -20% - Either of these work, CD makes it to where you can always have it up, while the duration leave you with a 1.2 second downtime.

For the last plate, there are a few plates you can use:

Flame locust DMG +20% (Basically your highest DPS move if used constantly).

Swift blow action speed +50% (what I use).

Applause DMG +20% (not recommended).

Gameplay:

PVE

PVP

Crescent Moon to Launch a Sci-Fi Mobile Game Later this Year [Updated]

$
0
0
Update on December 16, 2014: Crescent Moon has announced that Exile will be arriving on Google Play and iTunes on December 18th.

Crescent Moon has revealed a new trailer and some details on their upcoming sci-fi open world action-rpg. The game is called Exiles: Far Colony and it's like the mix of Mass Effect and the developer's own, Ravensword title.

In the game, players will be tasked with exploring an alien planet, discovering secrets witin the colony, and just doing general open-world shenanigans. Hop on an airbike and check out the landscape? Go for it. Want to see what's going on in some of the structures in the world? That's possible too. And there will be weird alien creatures to discover and defeat. Check out the new trailer for the game:
As you see, there will be both first and third-person shooting, and a combination of open worlds and corridor landscapes to visit. The soundtrack is being done by Sean Beeson, who did the soundtrack for Ravensword: Shadowlands and other Crescent Moon titles. Crescent Moon's self-developed titles have a particular ambition to them that's exciting because not a lot of developers are trying to adapt larger experiences for mobile platforms these days – people who like big and bold games will want to get excited for this one. Expect it by the end of the year.

SimCity BuildIt Guide: The Beginner's Handbook

$
0
0
Play online and never miss a thing!
SimCity BuildIt is best enjoyed online Your progress will be preserved (even across multiple devices), you will never miss an update with new content or improvements, and you’ll have a chance to jump on all the great deals in neighboring towns! Don’t worry if your connection gets lost--you can keep playing in offline mode. Just remember to reconnect as soon as you can in order to save the progress you made while playing offline. 

How do I save my game? Can I play across multiple devices?
There are three very good reasons for connecting through Facebook, Game Center, or Google Play in SimCity BuildIt.

First, you’ll keep your progress even if you switch to a new mobile device. Second, you can continue building your city across as many devices as you like using the same account; just make sure you play online regularly to keep them all in sync. Third, you get to visit all your friends’ cities too. What’s not to love?
Just click on the settings icon on the left of your screen to sign in on one or more account.

What are Simoleons and how do I get more of them?
Simoleons (§) are everyday currency: They are how your citizens pay their taxes; you receive them as rewards for building and upgrading; they are what you spend and receive in trades and deals. You’ll need Simoleons for things like purchasing different types of buildings or upgrading roads. Simoleons (§) make the SimCity world go round!

Start earning Simoleons by placing residential zones, areas for your citizens to build their homes. As your city expands you’ll have more opportunities to upgrade those homes, collect taxes, complete cargo shipments, make deals, and sell items to other players. Each of these actions will keep the Simoleons rolling in. If things get tight you can also convert your SimCash to Simoleons or purchase Simoleons in the store.

What is SimCash and how do I get more?

SimCash is a little more ‘Mayoral’ than Simoleons. You’re automatically given a pile of SimCash when you start creating your city and you can use it to grease the palms of your contractors (among others) to speed things up a little. If you like, you can also convert SimCash directly to Simoleons.

Get a SimCash bonus for every City Achievement target you hit! Collect your rewards for achievements in your Mayor’s Mansion. SimCash can also be purchased in the store.

How can I get Golden Keys?
Even more exclusive than SimCash, Golden Keys are worth their weight in, well, gold! Golden Keys can’t be bought with either Simoleons or SimCash; they must be earned by successfully completing cargo shipments or rebuilding your city if disaster strikes. They’re well worth acquiring as they enable you to purchase some very cool (and sometimes very famous) premium buildings, which you and your citizens will love. Be the envy of all your visitors!

What are the game controls? How can I look around?
Use one finger to tap and drag as you interact with buttons, items, and the various elements of your city. You can move buildings by first uprooting them with a tap and hold. 

To get the best views of your city: Pan with a one-finger drag, Zoom with a two-finger pinch-in or pinch-out, Rotate by moving two fingers clockwise or counter-clockwise, Tilt by moving two fingers up or down.

Can I change the name of my city?
Tap the Settings menu and select "Change City Name." Your name will be seen in the Global Trade HQ when you advertise your products and by your friends when they visit, so make it a good one!

How do I visit my friends?
Connect through Facebook, Game Center, or Google Play in the game, and you will be able to visit your friends’ cities. Have a look around at their city, check out their stats, and don’t forget to drop by their Trade Depots to see what they have for sale! Click on the green friend icon on the left of your screen to find your friends.

How do I increase my population?
It’s simple: Take care of your citizens! Happy neighborhoods attract more residents. Building and upgrading residential zones increases your base population. Maintain that population by providing essential Services, and boost it even further with cool Specialization Services like Parks, Education, Entertainment, and Transportation. 

When deciding where to place a Specialization, you’ll see blue bars appear on your city map. These represent the population boost percentage you’ll get if you build where you’re hovering, so choose wisely! Your population counter appears at the top of your screen, indicated by the blue “people” icon.

How do I keep my population happy?
If you fail to keep your citizens happy, they’ll abandon their homes and leave town. There’s one other very good reason to keep them satisfied—the happier the populace, the more taxes you will receive.

Check the smiley face happiness counter on the left of your screen. If the face is less than green, there are several ways to find out why. Opinion bubbles give you advance warning of problems like traffic jams, lack of services, boredom, or a dirty factory in the neighborhood. If red exclamation marks appear on the icons on the right of your screen, investigate by tapping them immediately!
They will hint at what improvements you can make to keep your citizens satisfied. You can also get a visual check on how happy each individual zone is by selecting the Government icon in the Services menu. 

What are factories for?
Factories produce raw materials to keep your city growing. Tap on a factory and select the material you want to create by dragging it on top of the factory building. When manufacturing is complete, your items will appear on top of the factory, where you can tap to collect them. Unlock a wider variety of production materials and more efficient factories as you progress through the game!

What do commercial buildings do for my city?
With commercial buildings (e.g. stores and markets), you can combine and reuse materials to make new, crafted items. Use seeds to make tomatoes, or craft metal into nails! Tap on your commercial building and tell your citizens what to craft by dragging the item on top of the building. You’ll see your finished, crafted items appear on top of the building when they’re done, and you can tap them to collect them. Unlock new crafting "recipes" as you progress through the game!

How can I buy items and sell my inventory?
Buying and selling materials is a great way to save valuable manufacturing time or increase your Simoleon levels. There are four main ways to do business: Unlock the Trade Depot for selling, the Global Trade HQ for buying, accept (or refuse) deals that appear on your city map from other citizens, or complete cargo shipments by sea. This last one can also net you Golden Keys as a reward! Don’t forget you can also visit friends’ cities to see what they have on offer.

How do I build and improve homes?
When you place a residential zone, it gives your citizens an area to start building homes. This boosts your population, gets you closer to your next level up target, and keeps the Simoleons coming in. 

Place a residential zone next to a road to start the building process, then tap the hard hat icon to view the building plans drawn up by the architect for the work ahead. Building plans show you the items your contractor needs to get the job done.
Once the building plan materials are gathered, drag the building materials on top of the building, and the work will be completed automatically.

How do I move my buildings around?
Press and hold a building, drag it to a new location, and hit the green checkmark to confirm the move. The white outline below the moving building shows where it will sit in your city.

Why are roads important?
Roads are the crucial arteries of your city; buildings must be connected to the rest of your city with a road in order to function. Roads not only carry traffic connecting your citizens to the outside world, they also carry vital Services from building to building such as power, water, and sewage! And don’t forget that your emergency services need those roads in order to reach homes in need! Tap the road icon on the right of the screen to build, upgrade, or bulldoze your roads.

What are Special Items?
As Mayor, it’s important to pay attention to your citizens. Around your city, you will frequently see opinion bubbles appear over homes. Tap on them to learn your residents’ thoughts. For your interest in their hopes and dreams, your population will sometimes reward you with Special Items! There are several different types of themed Special Items. As you accumulate a collection, you can exchange them to upgrade the City Storage, open expansion zones, or instigate disaster challenges. If you just can’t wait for more Special Items, you can buy them with SimCash.

What are City Achievements?
City Achievements are awarded at your Mayor’s Mansion. These are granted for excellent Mayoral performance like hitting population milestones, being a super-achieving trader, or providing excellent Services for your citizens. Get different Achievements depending on which direction you’re guiding your town. Solar power? Education? Sin? There are Achievements to reward your choices. 

When you earn Achievements, you receive bonuses in SimCash. Each Achievement has three star levels, with a SimCash reward at each level.

Why do I need storage? How can I make more space?
When you purchase items in the Global Trade HQ or pick up items created in your factories or commercial buildings, you must collect them to your inventory, which is kept in your City Storage building. Free up space in your City Storage by using stored materials to build and upgrade, and remember you can sell and trade items too (so keep checking out the deals that appear on your city map). To increase the capacity of your City Storage, collect storage-themed Special Items from citizens’ opinion bubbles, then tap "Increase Capacity" from within your City Storage menu.

How can I expand my city?
If space is getting tight, expanding your city area will give you more space to grow your population, keep them entertained, build more factories and commercial buildings, and generally unleash your creativity. After reaching the required level, tap outside your current city limits to see which bulldozer-themed Special Items you need to collect for each expansion zone.

Can I remodel my city?
Of course! Land is precious and you can rearrange your city however you choose. It makes sense to replace older factories and Service buildings for more efficient versions when you can. Use the bulldoze tool to take down roads, residential zones, and other buildings to make more space; you’ll even get a partial refund for those buildings originally paid for with Simoleons! Tap the road icon, then choose "Bulldoze" to demolish sections of road. 
To demolish a building, tap and hold the building you’d like to remove, then tap the bulldozer icon that will appear on the right side of the screen. Now feel free to rebuild as you please. Just remember, bulldozing a residential zone will reduce your population!

What are Services?
Your citizens have needs! The Service requirements of your citizens are reasonable, although some we don’t like to think about too often….  As Mayor, there are eight main areas of well-being you must consider. If you don’t keep your citizens Happy, they’ll move out!

First, government buildings are required to help run things smoothly and keep you solvent with Simoleon taxes and SimCash Achievements. Next, Sim neighborhoods need basic Services like Power, Water, Sewage, and Waste (garbage). Last but not least, your citizens will feel reassured with emergency Services nearby, like Fire and Police forces and Health facilities. 

What are Specializations?
Services build and maintain your population numbers: Specializations boost them even further! Specializations add an extra-special layer of activity and excitement to your city that citizens will want to be near, with some incredible buildings and stat-boosting functions. Choose your Specializations by deciding how you want your city to look, or which activities you value most for your citizens. Different Specializations make different types of City Achievements possible!
Parks, Gambling, Entertainment, Landmarks, Education, and Transport all help to keep your citizens happy, occupied, and less likely to complain. They also boost the local population, so check out the blue bars that appear while you’re placing your Specialization building! The bigger the bar, the bigger the population boost. Pretty special altogether, really.

How do I get my city to look slicker?
If you prefer skyscrapers in marble and glass to edifices of brick and plastic, attract wealthier citizens to build in your city. If you make sure to provide plenty of the Services and Specializations to cover a specific area (Parks, Entertainment, Fire, Police, Health, Education, and Transportation), then buildings in that neighborhood will become increasingly attractive on future upgrades! The greater service coverage you provide an area, the better looking an area becomes. 

Check out the land values of your city visually, by tapping on the residential zone icon on the right of your screen. You can also see how the next upgrade will affect each building.

What are disaster challenges?
Nobody panic! Everything is under control! Dr. Vu has been…experimenting. He might not be everyone’s idea of a good neighbour, but he’s your ticket to getting some of those elusive Golden Keys. Unlock disaster challenges by building your population level nice and high and helping out with Vu Tower's construction.

Collect Dr. Vu-themed Special Items to unlock a disaster challenge. Will it come from the air? The sea? The earth? How big will it be? Are we feeling lucky? Will the llamas be okay? All there is to do now is wait…

Whew. Is everyone still here? When the dust has settled, it’s up to you to rebuild. Tap the area affected to see which materials are needed, and enjoy your Golden Key rewards when rebuilding is complete. I wonder what type of disaster we might see next time?

Can I toggle the Sound Effects / Notifications / Music?
Sure! Just go to the Settings menu.

Credits: Special thanks to EA (developer of this game) for making this guide.

Realistic city builder "SimCity BuildIt" announced for mobiles [Updated]

$
0
0
Update on December 16, 2014: SimCity BuildIt is now out globally! You can download it for free on your iPhone/iPad or android devices now. Just go to google play or iTunes to download the game.

Electronic Arts will be releasi a new Sims game in the form of city builder called SimCity BuildIt. The game will let you create your very own luxurious city on your android or iOs devices.

This is not th3 very first city builder thay EA has released on mobiles. If you can remember, the have a city builder game in the past named SimCity Deluxe but it has beem removed. Now, EA promises that this will be a new city building experience "on the go" for all handheld gamers.

"The choices you make evolve your city in a variety of ways. Meet your citisens' needs to keep them happy, or make questionable choices and feel your citisens' wrath," reads a statement from the company.

"Pinch, zoom, and rotate 360 degrees as you manage your city in the palm of your hand. With countless buildings and vivid, 3D-quality graphics, it's the most advanced mobile building simulation game."

No details on its specific features or release date. Just stay tuned on this blog as we will give you future updates about SimCity BuildIt. For now you can check out some early images of the game below.

Rockstar Games' GTA Online Heists Gets a Release Date

$
0
0
Rockstar Games has revealed the often delayed GTA Online Heists release date for Grand Theft Auto V’s online mode will fall in “Early 2015″. When a publisher says this, it means Q1 2015, which in turn means you can expect to play the Heists game mode in either January, February or March of 2015. Just a few more months.

Watch the first Grand Theft Auto Online – Heists trailer here:
GTA Online Heists are coming early in 2015 – check out the new trailer for the four-player co-op mode for Grand Theft Auto Online that allows players to plan, prepare and execute multi-tiered Heists across Los Santos and Blaine County.

These heists will require tight communication and coordination, with players taking on specified roles at each point to accomplish multiple objectives on the way to each Heist’s epic finale. Featuring new gameplay, new vehicles, new weapons, new clothing and much more.

Dragon Nest Final Damage Calculation in Level 80 Cap [T4]

$
0
0
Have questions in Final Damage on Level 80 Cap in Dragon Nest? Then this page will help you solve your problem. Here you will know how to calculate your FD in Dragon Nest at Level 80 Cap [T4].

Using Chaos' Level 70 version as the base, as well as his format.

{0.00774X,0.0000009093X^2.2}max

Linear growth before 1884 FD. (14.6%)
2974 FD (100% for 70 Cap) = 39.8 or ~40% for 80 Cap
100% for 80 Cap = 4520 FD
You can have your own calculation by going to this link>http://www.mediafire.com/?697pqrjszogps0i

Dot Arena Guide: How to Clear Crucible of Fire with Ease

$
0
0
Here's a guide on how to clear Crucible of Fire easily on Dot Arena. This guide is in the for of video which will show you how to clear Dot Arena Crucible of Fire without guild mercenary and no hero dead until the 15/15 which is negligible by then.

Part 1
Part 2
Credits: Special thanks to Ivan Seet for making the video guide.

71-80 Leveling Guide in Dragon Nest [T4]

$
0
0
Okay! Now that you got the latest level cap in Dragon Nest which is level 80, we're pretty sure that you are now looking for ways on how to level up your character to 80 fast.

We'll we will say this directly- You'll grind really hard just to level up to 80. However, there are certain ways to level up faster from 71-80. This method is way faster tha  yours we think. :)

How to level up fast to 80 cap in DN?
We suggest not to grind if you don't want to get bored in leveling, but do all those quests available from 70-80. You get roughly 2k gold going from 70-80 (and that's with the 70% exp scroll from the fragments that drop in those dungeons), excluding all the Goddess Sigh you get from the main quest.  

But if you just want to grind your way to level 80, then the fastest maps are 70-74 (Third dungeon from the left), 75-80 (Second dungeon from the left) because they are pretty straightforward. Hard is definitely best EXP/Time, though that isn't suggested for servers with the FTG system. 700 FTG recommendation is 4 Normal + 2 Hard, get the 300 FTG from likes for another 2 Normal + 1 Hard, total of 6 Normal + 3 Hard.

These are just tips on how to level up fast in Dragon Nest to 80. If you have a faster way of leveling, please do share it on the comment box below.

Naruto Shippuden: Ultimate Ninja Storm 4 Announced for PS4, Xbox One & PC

$
0
0
Naruto Shippuden: Ultimate Ninja Storm 4 has been officially announced for Playstation 4, Xbox One and PC via Steam! Developer CyberConnect2’s newest fighting game will arrive in 2015!

A final massive strike from the Storm Series will hit America, Canada, Europe, Middle-East and Australasia as leading video game publisher and developer, Bandai Namco Games, today announced Naruto Shippuden: Ultimate Ninja Storm 4 for the PlayStation 4 computer entertainment system, Xbox One, all-in-one games and entertainment system from Microsoft, and Steam.

World renowned Japanese developer and anime aficionados, CyberConnect2, are creating the most comprehensive and electric Naruto game ever. Developed exclusively for the new generation of video game consoles and PC hardware, Naruto Shippuden: Ultimate Ninja Storm 4 will deliver unbelievable graphics that go beyond anime-quality with blisteringly fast gameplay.

The series’ trademark one-on-one multiplayer modes return for offline and online play. Challenge players from across the world or across the couch in heated single match battles to determine the ultimate ninja.

To quote the publisher: “The Storm series continues to be one of our most popular franchises and its leap to the new generation of hardware ensures that it won’t stop now. Our long-time partner, CyberConnect2, has always poured their hearts into the Naruto franchise and Naruto Shippuden: Ultimate Ninja Storm 4 looks forward to be the ultimate realization of the series!” says Herve Hoerdt, Vice President of IP Strategy at Bandai Namco Games Europe.
source: videogamesblogger.com

Dragon Nest Guide: Screamer's Summon Puppet

$
0
0
Summon Puppet is one of the characteristic skills  for Screamer class in Dragon Nest. The mechanics of Summon Puppet is investigated and explained by Sieg& Azure of Freedom guild.

What Exactly is Screamer’s Puppet

Before I begin, I would like to thank Azure for all the help he has rendered, not just in conducting the tests but for sharing his insights as well. What is contained henceforth is the result of a few days of hard work, complete with game play videos to prove my points. I will however state first that I am no experienced Screamer, it is possible for the data gathered to be wrong if there has been any oversight.

So what is Puppet? Puppet is a damage transfer summon. When I say summon, I mean it in every sense of the word in Dragon Nest, meaning it shares the mechanics of the other summons in Dragon Nest. By a damage transfer summon, I mean that all damage dealt to the Puppet is transferred to the target.

This means that when Puppet is summoned

- Buffs/Debuffs on the target that changes the stats of the target is copied
- Buffs/Debuffs on the target that do NOT change the stat of the target is NOT copied
- The Puppet starts on a clean slate with no buffs/debuffs ASIDE from the damage amplification debuff from the Puppet itself

From the point Puppet is summoned, it is treated as a new unit on the field, separate from the target it spawned from. Further buffs/debuffs that target the boss will not be transferred to the Puppet, further buffs/debuffs to the Puppet will not be transferred to the boss. The simplest way to take note of this is Puppet’s curse layer – it will only apply to the target and not the Puppet itself. The only exception to this rule is Puppet’s damage increase debuff.

Aside from the damage transfer aspect of Puppet, it has 2 other uses

- induces a 22% (at Level 6) damage debuff that lasts for 15s, continues even after Puppet has left the field in the event of shortened duration

- Induces a curse layer that reduces target elemental resistance by 5%. This curse layer is NOT given immediately at the point Puppet is spawned.

Damage Amplification Cap

Firstly, let us address the claim that Puppet goes beyond the 100% damage amplification cap.

Here is a link to the original post that contains the Puppet damage debuff test


For those who wish to argue the point – You know that Hemo is at least Level 8, Cyclone Slash EX gives 30%. Level 5 Puppet is 19%, giving us a total of 99% damage amplification. Level 6 Puppet is 22%, giving us a total of 102% damage amplification. How did we arrive at just 2x the damage if Puppet is not in the same multiplier group? Let us assume that Puppet is a separate multiplier altogether.

768 * 1.8 (Hemo + Cyclone EX) * 1.22 (Level 6 Puppet) = 1686.528
768 * 1.8 * 1.19 = 1645

Both are far higher than the 1538 obtained.

Let us now address the transferring of debuffs. In order to address those that might say that Puppet transfers its debuffs AFTER it has left the field for cases with shortened duration, we will use a boss that Puppet has shortened duration on to test this instead of good old Gardener.


Poison King (Guardian Nest)
All elemental resistance 20%

Soul Wind (raw): 19215
Soul Wind (3 curse layers – Soul Gate): 22818

X * (1 – 0.2) = 19215, where X = Soul Wind damage pre resistance reduction
X = 19215 / 0.8
= 24018.75

At 3 curse layers, target elemental resistance = 5%

24018.75 * (1 – 0.05) = 22817.8125 (tallies)

Last Soul Wind hit at 0:27, meaning the next 3 hits came from Soul Gate

Puppet -> Spirit Paper on Puppet -> Soul Wind

0:36, Soul Wind damage 32233 (Soul Gate curse debuff lasts for 10s)

22817.8125 * 1.22 (Level 6 Puppet) / 0.95 (To get back to 0% Dark resist value) * 1.10 (The new stack of 3 curse layers) = 32233.1625 (tallies)

0:46, Soul Wind damage 23443

Last hit of Spirit Paper was at 0:34. Spirit Paper curse layer lasts for 16s, meaning if the curse layer was transferred, target elemental resistance would be at 5% instead of 20%

Expected value if curse layers do transfer: X * 0.95 * 1.22 = 27837.73125
Expected value if curse layers do NOT transfer: X * 0.8 * 1.22 = 23442.3 (tallies)

Puppet summoned: 0:32 (Debuff lasts for 15s)

0:51, Soul Wind damage 19215 (back to raw damage)

Test repeated, but boss targeted with Soul Wind instead of Puppet this time after Puppet + Double Curse Layers

1:06, Soul Wind damage 19215 (raw)

1:18, Stigma was used on boss, causing the 6th hit in a combo
1:20, combo counter reached 10, meaning there were 4 hits on the boss from Soul Gate
1:21, Puppet was cast
1:23, Last hit of Spirit Paper on puppet

1:25, Soul Wind damage 27838

Double curse value is 32233 as previously derived.

X * 0.95 (3 curse layers from Soul Gate) * 1.22 = 27837.73125 (tallies)

1:30, Soul Wind damage 27838 (Last hit of Soul Gate was at the 1:20 range, so still in effect)

We can tell from this test that

- The curse stack on the Puppet was NOT transferred over to the boss regardless of if Puppet has left the field
There is however 2 possibilities that this can be attributed to.
- Curse being unable to overwrite itself (Curse stacking issues)
- Curse being a unique case

Let us first take a look at

Curse Stacking


Soul Wind (Raw): 604

After Spirit Paper
Soul Wind: 622

After Soul Gate
Soul Wind: 622

After 1 Cast of Puppet
Soul Wind: 717

622/604= ~1.03, giving us 1% per layer
717/604/1.13 (Level 6 Puppet Damage amplification in PvP) = ~1.05, giving us 5% per layer

Since the curse layer works differently in PvP, we can determine values far more accurately.

Puppet -> Spirit Paper
Soul Wind: 730

Spirit Paper -> Puppet
Soul Wind: 703

Puppet Expires, Curse Still in Effect
Soul Wind: 646, 604

730/1.13/604 = ~1.07 (5% Puppet, 2% Spirit Paper)
703/1.13/604 = ~1.03 (3% Spirit Paper)

How does Curse Stacking work then, from these results? Curse layers are first come first served, each curse layer is separate but only 3 can be active at a time, resolved in order the curse layer was induced.

Is Curse itself a unique case?


Since we are exploring the possibility of other effects, let us conduct even more of the relevant tests then.

0:23, Divine Punishment: 3912, 7954 (Crit)
0:29. Zap was used

Gardener light resist is 10%, Zap reduces it by 15%

3912 / 0.9 * 1.05 = 4564

After Zap
Divine Punishment: 4564 (tallies), 9278

1:16, Puppet was summoned
1:20, Smite on Puppet
1:21, Charged Volt on Puppet

1:25 Divine Punishment: 4772

3912 * 1.22 (Puppet) = 4772.64 (Smite and Charged Volt resist reduction were NOT transferred) – (tallies)

1:31 Divine Punishment: 3912 (Raw, puppet debuff over since it lasts for 15s only)

We can conclude that

- Curse is not the only debuff that cannot be transferred, if any can
- Even different resist reduction layers do not transfer

Smasher, 1:45 onwards

Left Click (Raw): 2542, 5136 (Crit)

Puppet was used first, followed by Mirror. Same pulse of Mirror would have hit both.

Left Click on Boss: 3990/3991
Left Click on Puppet: 3990
Left Click after Puppet expired: 3432

2542 * (1.35 [Mirror] + 1.22 [Puppet]) = 3990.94
2542 * 1.35 = 3431.7

2:27, Mirror summoned, boss debuffed
2:32, Puppet summoned

If Mirror debuff on boss was transferred to Puppet, expected damage value would be
2542 * (1.35 + 1.35 + 1.22) = 4880.64

Left Click on Boss: 3990
Left Click on Puppet: 3990

- Double mirror debuff did NOT occur

3:16, LC 2542
3:17, LC 3102 (2542 * 1.22 = 3101.24, tallies)

3:25, Mirror summoned, puppet debuffed, boss not debuffed
3:28, LC 3102 (No change)

- Mirror debuff from Puppet did not transfer to the boss

3:37, Mirror summoned, boss debuffed
3:39, Force Shield activated

LC with Force Shield + Mirror: 4460

3:44, Puppet summoned

LC on Puppet with Force Shield and no mirror debuff: 4030

4460/ 1.35 (Mirror) * 1.22 (Puppet) = 4030.5185 (tallies)

- Mirror debuff from Boss did not transfer to the Puppet

3:57, LC on Boss (Mirror + Puppet) = 5187

4460 / 1.35 * 1.57 = 5186.8148 (tallies)

Abyss Walker, 3:59 onwards

4:02, Nightfall cast

Nightfall per hit damage: 50390 (Crit)

4:05, Puppet summoned

Nightfall damage: 0, Totally removed. You can see for yourselves, no healing circle from the small orc, no numbers at all, HP bar of Gardener did not move

4:40, Puppet summoned
4:42, Nightfall cast

Nightfall per hit damage: 58662 (Crit)

50390 / 1.34 (Nightfall) * 1.56 (Nightfall + Puppet) = 58662.985 (tallies)

________________________________________________

Why does the curse layer have no effect?

AoE skills such as Nightfall and Consecration, if it hits both the target and the puppet, will prioritize the damage to the puppet. As such, the effect from the curse layer is not utilized since Puppet does not benefit from its own curse layer.

The way this works is also the most likely reason why Nightfall (and I suspect it is the same for Consecration and the like) does 0 damage if Puppet is cast after Nightfall. Nightfall can only damage one out of the 2, and has selected Gardener as its target, but the Puppet being prioritized means that no damage is dealt instead.

*** This is just a hypothesis ***

________________________________________________

5:27, Puppet summoned
5:31, Nightfall cast

Nightfall per hit damage transferred: 58662 (Crit), same as above scenario.

Conclusion

Skills which affect stats, i.e. elemental resist, critical resist, even Devastating Howl (although reducing the board damage of Puppet has no meaning) are transferred to the Puppet.

Skills which do not affect stats, including ALL damage amplification debuffs are NOT transferred to the Puppet ASIDE from puppet’s own damage amplification.

Puppet however, can be further debuffed as a new unit on the field. This means that you can double debuff as demonstrated in the second video. However, the moment Puppet leaves the field, that damage avenue is lost.

It is impossible to more than double debuff because you cannot summon a Puppet from a Puppet. If the boss stats remains the same, the Puppet that spawns from the boss is the maximum limit that you can debuff.

It is IMPOSSIBLE to go below -100% Elemental Resistance on the Puppet. Since it copies the boss stats, if the boss is already at -100% Elemental Resistance, the Puppet will be too

Double debuffing Critical Resistance reduction is very unrewarding. Let us use an imaginary scenario, Critical Resistance is 10000, Crit Resist Reduction 50%. Boss is debuffed, left with 5000 Crit Resistance. A further debuff on Puppet will reduce it to 2500, not 0.

When to use Puppet

- If there is a scenario where double debuffing could prove useful (near negligible)
- If the damage amplification debuff cap is not hit

Or else

You will be wasting time casting a Puppet that

- Does not exceed the damage amplification debuff cap
- An unnecessary curse layer
- Removes the effects of Finishing Attack / Dance 2
- Potentially removes the damage from Nightfall/Consecration, both of which are priority moves BEFORE Puppet (according to the Screamer rotation priority)
- Waste any debuffs that hits the puppet instead of the boss (If both are hit both will be debuffed though)

If anyone has some other evidence to present or other conclusions that were derived, feel free to share them.

Famous MMORPG "Flyff" Goes Mobile

$
0
0
One of the famous MMORPG of all time now has a mobile game called Flyff All Stars. You can check out a brief overview on the game below.

FLYFF PC Online has been reborn as 3D Mobile Action RPG!

FLYFF All Stars is a casual 3D action RPG where players collect over 200 unique heroes, enhance their powers, unlock more powerful heroes, fight in dungeons and regional arenas, and engage in other exciting game modes.

FLYFF All Stars is a free-to-play game. 

- Features:
Amazing 3D Graphics
Over 200 Unique Heroes
75 Dungeons filled with crazy monsters.
Competitive options : PvP Arena, Time Zone and more to come!
Easy gameplay via Auto-Mode

Check out the game in action below.

We have tried the game for a couple of hours and we can say that it does have a potential on becoming an awesome game on mobile devices. Our first few minutes on the game felt like we are playing Hello Hero all over again. The game does have spme Hello Hero mechanics wherein you collect heroes to join you in battle. But after an hour it feels totally different as the Flyff experience seems to get into the game as you play it further. Well, we don't want to spoil the game so we'll leave it up to you whether you will like the game or not. But we highly recommend trying it out. Anyeay, it's Free so nothing will be loss if you play it. The download links are below.

Flyff All Stars Crystal and Gold Hack [Working]- Say What???!!!!

$
0
0
Fresh from reporting that Flyff All Star is now available on iOs and Android, one of our source has emailed us that the said mobile game already have a hack!

The hack will let you have unlimited gold coins and tons of crystals in the game so you won't be grinding anymore (jeez! where's the fund on that???). The hack was originally posted on sinfuliphone.com and you can check it out below.

Note: This hack was tested to be working on iPhone/iPad version of the game. The android version has not been tested so if you tried and made it worked, please do confirm it by writing your comment below.

NO JAILBREAK REQUIRED!

Note: This is a UNIVERSAL APP so this HACK works for both iPhone and iPad.

HACK FEATURES
*987654321 GOLD*
*TONS OF CRYSTALS*

*BACKUP YOUR DOCUMENTS & LIBRARY FOLDERS FIRST
INSTRUCTIONS:
1. DELETE & REINSTALL THE APP.

2. DON'T OPEN THE APP YET.

3. Download this:
Alternative Link:
Password: XgTeP6cF

9876543 Gold & Tons of Crystals Only
Password: GhEkXyXu
Alternative Link:
Password: TIPyU61n

4. Unzip, copy/paste the com.mobblo.allstars plist file using iFunBox to:
User Applications/Flyff All Stars/Library/Preferences

5. Now you can open the App. Done!

In our honest opinion, this hack really ruin the game. It makes it non-replayable and far more worst, it's totally unfair. We hope that the developer will address on this soon.

Chain Chronicle- RPG Guide: How to Obtain 5* Characters Through Rerolling

$
0
0
What is Rerolling in Chain Chronicle- RPG?

Rerolling is a method to obtain desirable characters at the start of the game, most notably 5* characters.This is done by repeatedly making new guest accounts and use the premium ticket and prysma that came with the tutorial completion for chances to roll a good character at the starting tavern.

Rerolling is not necessary but it may grant you a 5* UR character right at the start of the game. It doesn't make or break the game as you can obtain many more useful 5*s later on but it may make your game a little easier at the start

Rerolling Guide

Rerolling is: Doing all 9 parts of the tutorial over and over again to roll using the x1 Premium Ticket and x50 Prysma reward (this takes ~15 minutes). The alternate method involves skipping the tutorial completely and using only 1 roll. It's up to you which one you want to do.

The rate of rolling a UR in version 1 of Chain Chronicle is currently 1.7%. It changed to 7% in version 2, but sadly we are not there yet.

Before you start, make sure you remember not to link your account to Facebook. Once linked, it can be undone, but is a somewhat tedious process (check the FAQ section for more details).

For a complete list of what's a good/bad/average pull, this guide on the official forums is great.
If you are absolutely sick of rerolling, here are some good 3* units you can run with.

How to reroll: for Android devices (also works for Android emulators)

1. Go to Settings on the Android Home page.
2. Find & tap the Chain Chronicle app.
3. Find & tap the "Clear data" button.
4. Restart the Chain Chronicle app.

How to reroll: for iOS devices (the following assumes you have TWO iOS devices)

For iOS devices, you need two devices. Install the game on both devices.

Device 1 contains your original game.

After re-roll and you have determined that you do not want this game, go to Menu -> Settings -> Transfer Data. Set the password.

On Device 2, tap Transfer Data on main menu. Enter ID and Password.

After transfer is successful, the game data on Device 1 disappears. Close (no need to delete) the app completely and start again. A new game will begin and you can do your re-roll.

Note 1: Things get slightly more complicated if you link your account to Facebook; so don't link until you're sure you want that account.
Note 2: If you still want to keep the game data on Device 2 (once you Transfer Data again, the old game data on Device 2 will be wiped out), set the password on Menu -> Settings -> Transfer Data again and write down the ID/Password somewhere for future.

As an addendum to the above, one iOS and one Android also works, but there is a better way to RR if you have an Android.

How to reroll: for iOS devices (alternate method, assumes you have one iOS device and one Android device or emulator)
PSA: CROSS PLATFORM DATA TRANSFERS ARE POSSIBLE (as of 12/8/2014) BUT IT WILL RESET YOUR PRYSMA. Spend it all first. (credit: wavesurfer)

1. Reroll using the Android method.
2. Use "Data Transfer" to set an ID + PW to move the desired file to the iOS device.

Side Guide: How to get Chain Chronicle to work on an Android Emulator (Genymotion)
Version 1.0.0.3 seems to work with Genymotion. Yay! Get it on the Play Store! 

Use Genymotion to do all your rerolling. Since this is based on personal experience, I can't tell you how this works on Andyroid or Bluestacks, but maybe another member can enlighten all of us.

Before you start, make sure you enable download from unknown sources under settings and security.

1. Search and download genymotion (too scared to provide download links until I make sure it's okay. Use google!)
2. Complete the Oracle VM setup first.
3. Launch Genymotion (Genymotion Shell is the cmd box--not the one you want).
4. Create the virtual machine (VM) that you want to emulate. My suggestion is to use version 4.3 (use the dropdown box). The device model doesn't seem to matter (I used the Nexus and Galaxy S3).
5. Go find the download links for the "ARM translation" and "Google Apps." The correct page should provide the instructions on how to properly install the software. Do it.
6. Download the latest version of the game from the Play Store, make sure it's version 1.0.0.3 so you get past the dreaded Sega Screen.
7. Have fun.

Frequently Asked Questions

Q: I've already linked my FB account. What now? Can I still reroll?
A: UPDATE: Apparently, you still have hope if you want to keep your original FB account. You will need 2 FB accounts:
1. Log on to the FB (Original Acct) linked to the undesirable CC account.
2. Go into privacy/settings, then scroll down to apps
3. Search for Chain Chronicle. Select to delete the app from the Original Acct (this only deletes it off the FB account, not your phone).
4. Now log out of your Original Acct on your phone and log into the second FB acct (Dummy Acct).
5. Load Chain Chronicle. In the menu screen, go through the process of linking to FB again. This time it will access your Dummy Acct and link your CC game to it instead.
6. Your Original Acct is now unlinked and you can link the account after you are done rerolling with the guest accounts.
(credit: Locke&dreadrabbit)

Q: Do I HAVE to re-roll/is re-rolling necessary?
A: Nope. It is completely possible to beat the game using 3* characters. The only foreseeable downside is that it will be more difficult to find high level friends, as they probably won't add your 3* unit over another 5* on their friend request list.

Q: MY TRANSFER ID ISN'T WORKING?!?!!
A: Make sure you've typed in all the letters correctly--the first part of the ID is always letters, followed by the numbers. Make sure you haven't confused lowercase "L" with the number "1" and so forth. (credit: wavesurfer)
Viewing all 3220 articles
Browse latest View live